

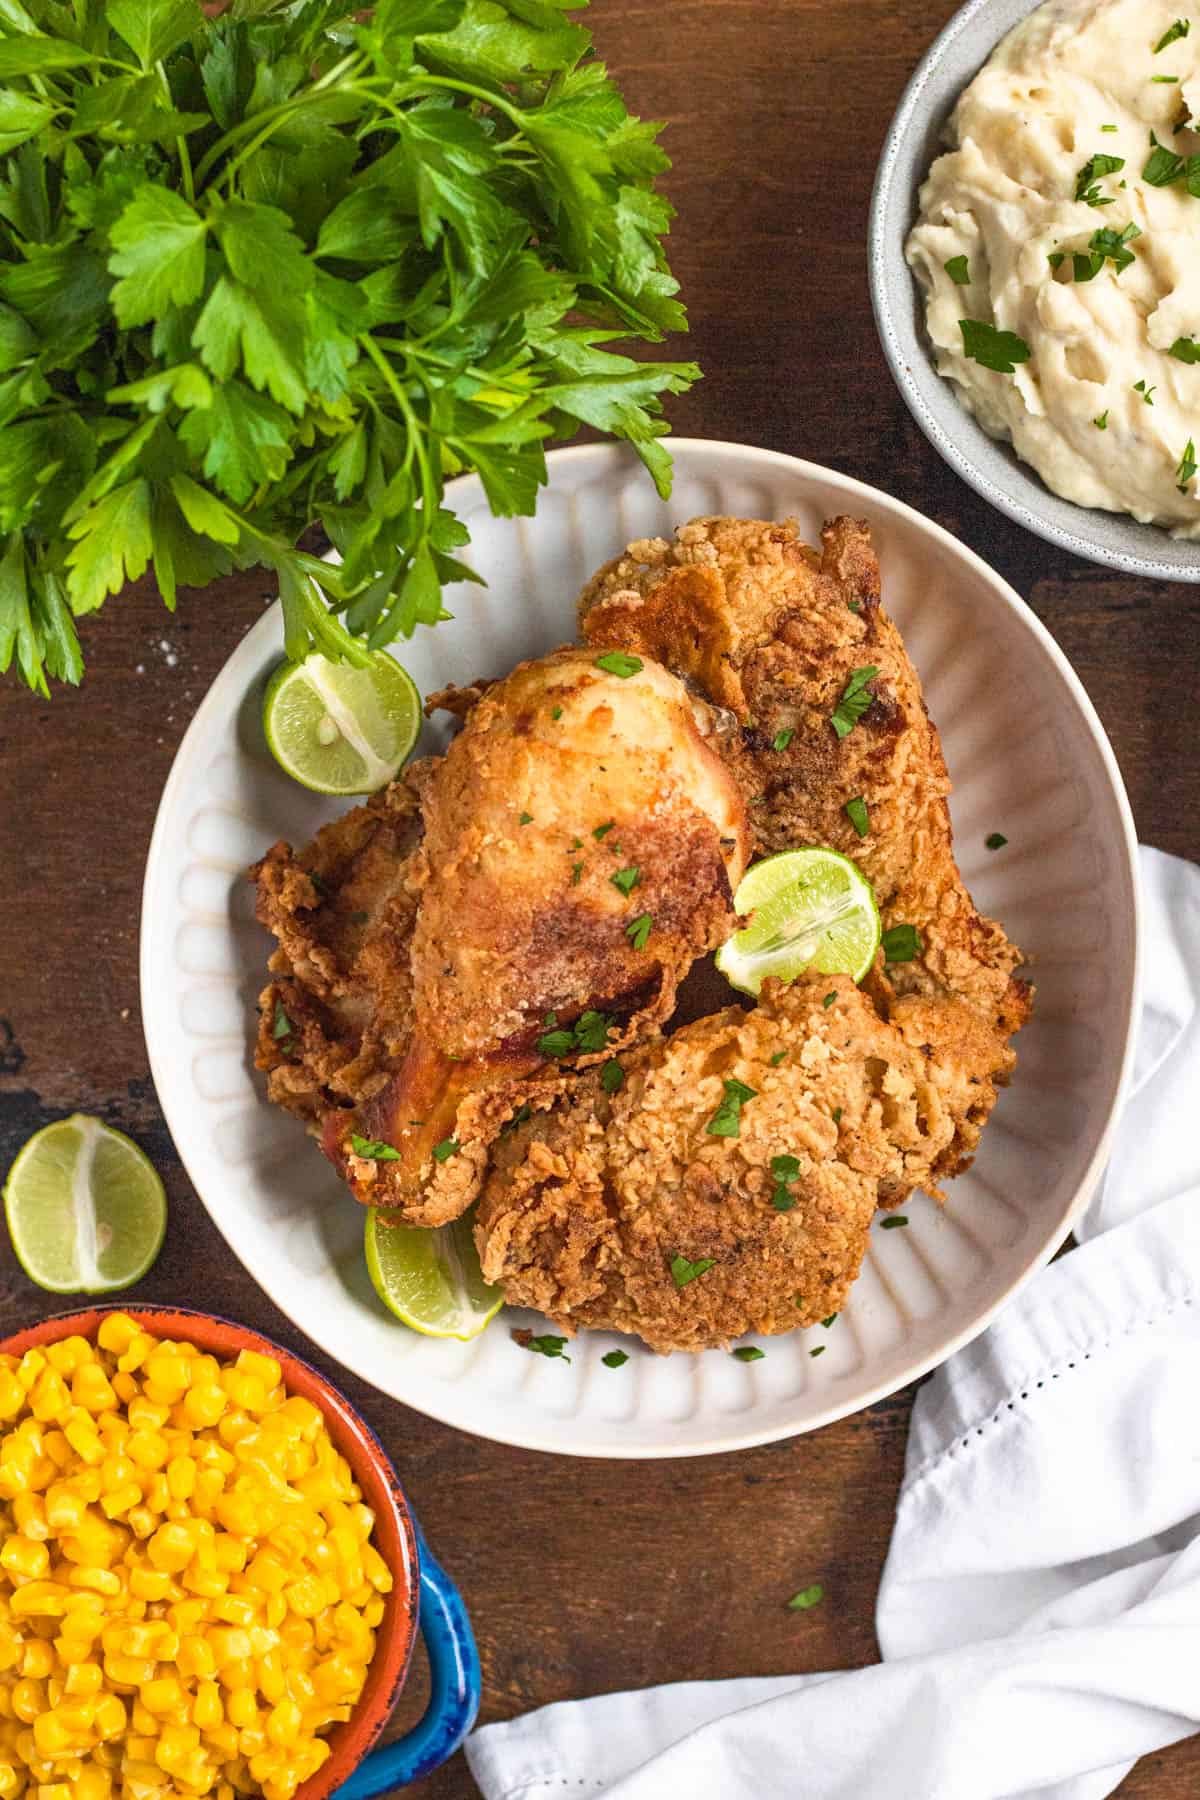
This gluten free fried chicken recipe is one you definitely need! It contains a variety of spices and a special gluten-free flour mixture to coat your chicken and make it crispy and delicious. Try it today and let me know what you think.
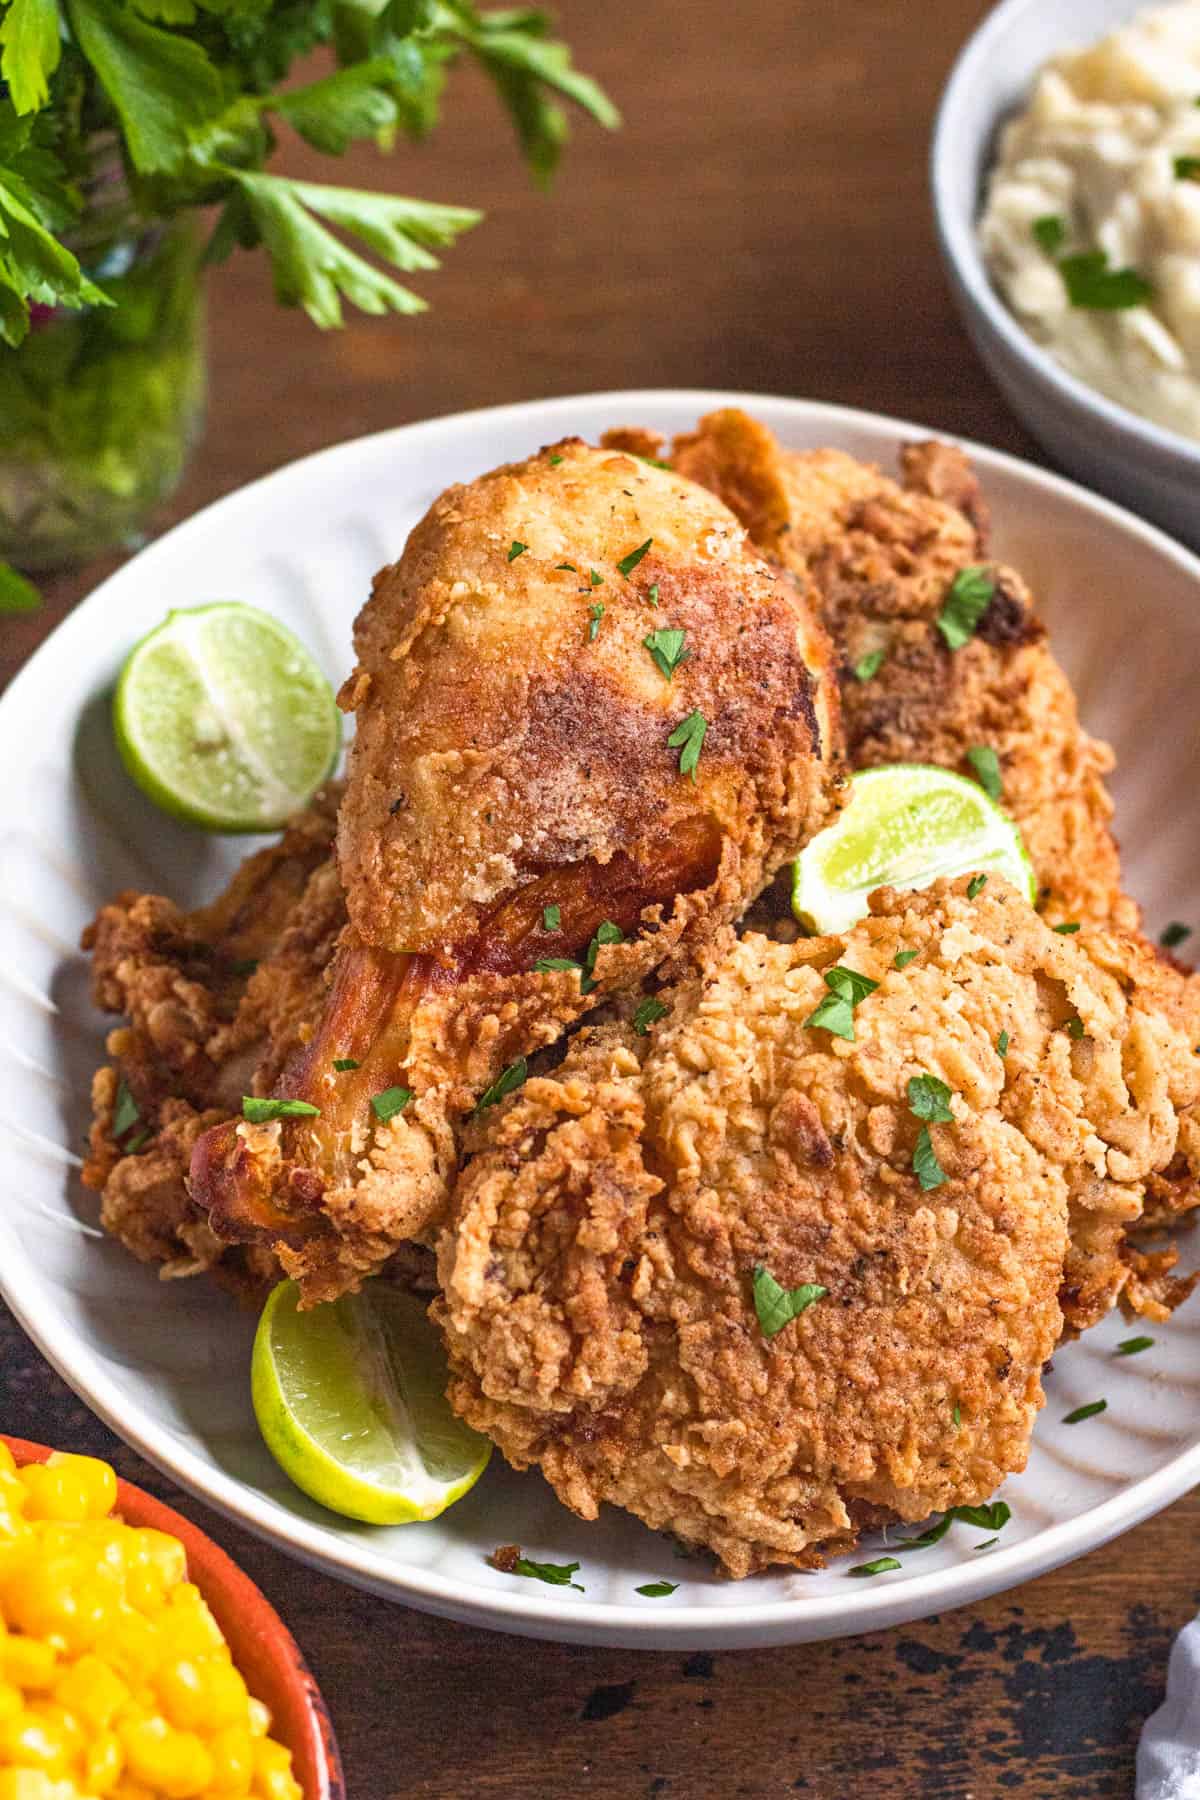
Similar to our Chick Fil A gluten free chicken sandwich, this recipe has a perfectly seasoned and coated crust. Each bite has a nice crunch.
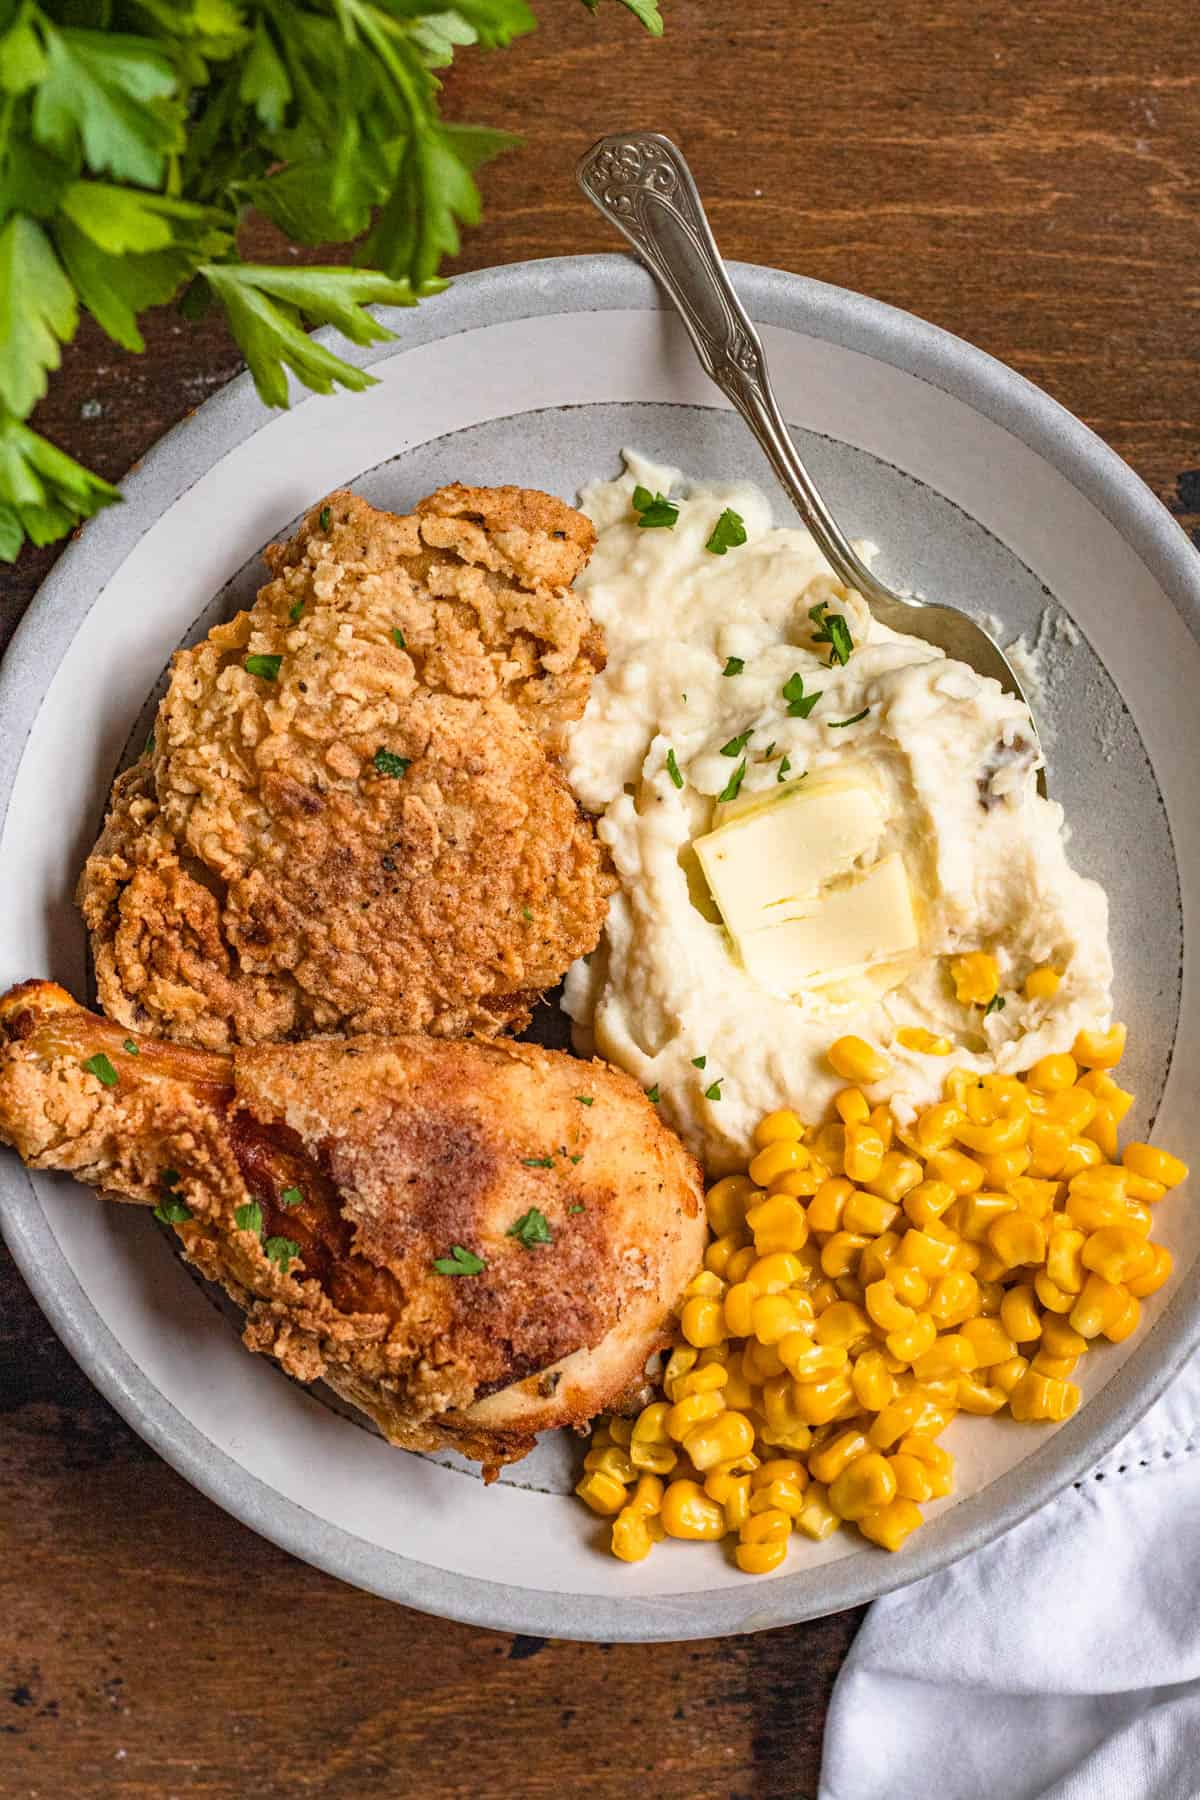
This extra crispy gluten free fried chicken is the perfect main dish. It goes great with our gluten free mashed potatoes and gluten free corn casserole.
I also love it with our gluten free green bean casserole and gluten free buttermilk biscuits. Finish the whole meal off with our razzleberry pie.
Recipe Ingredients
Brine
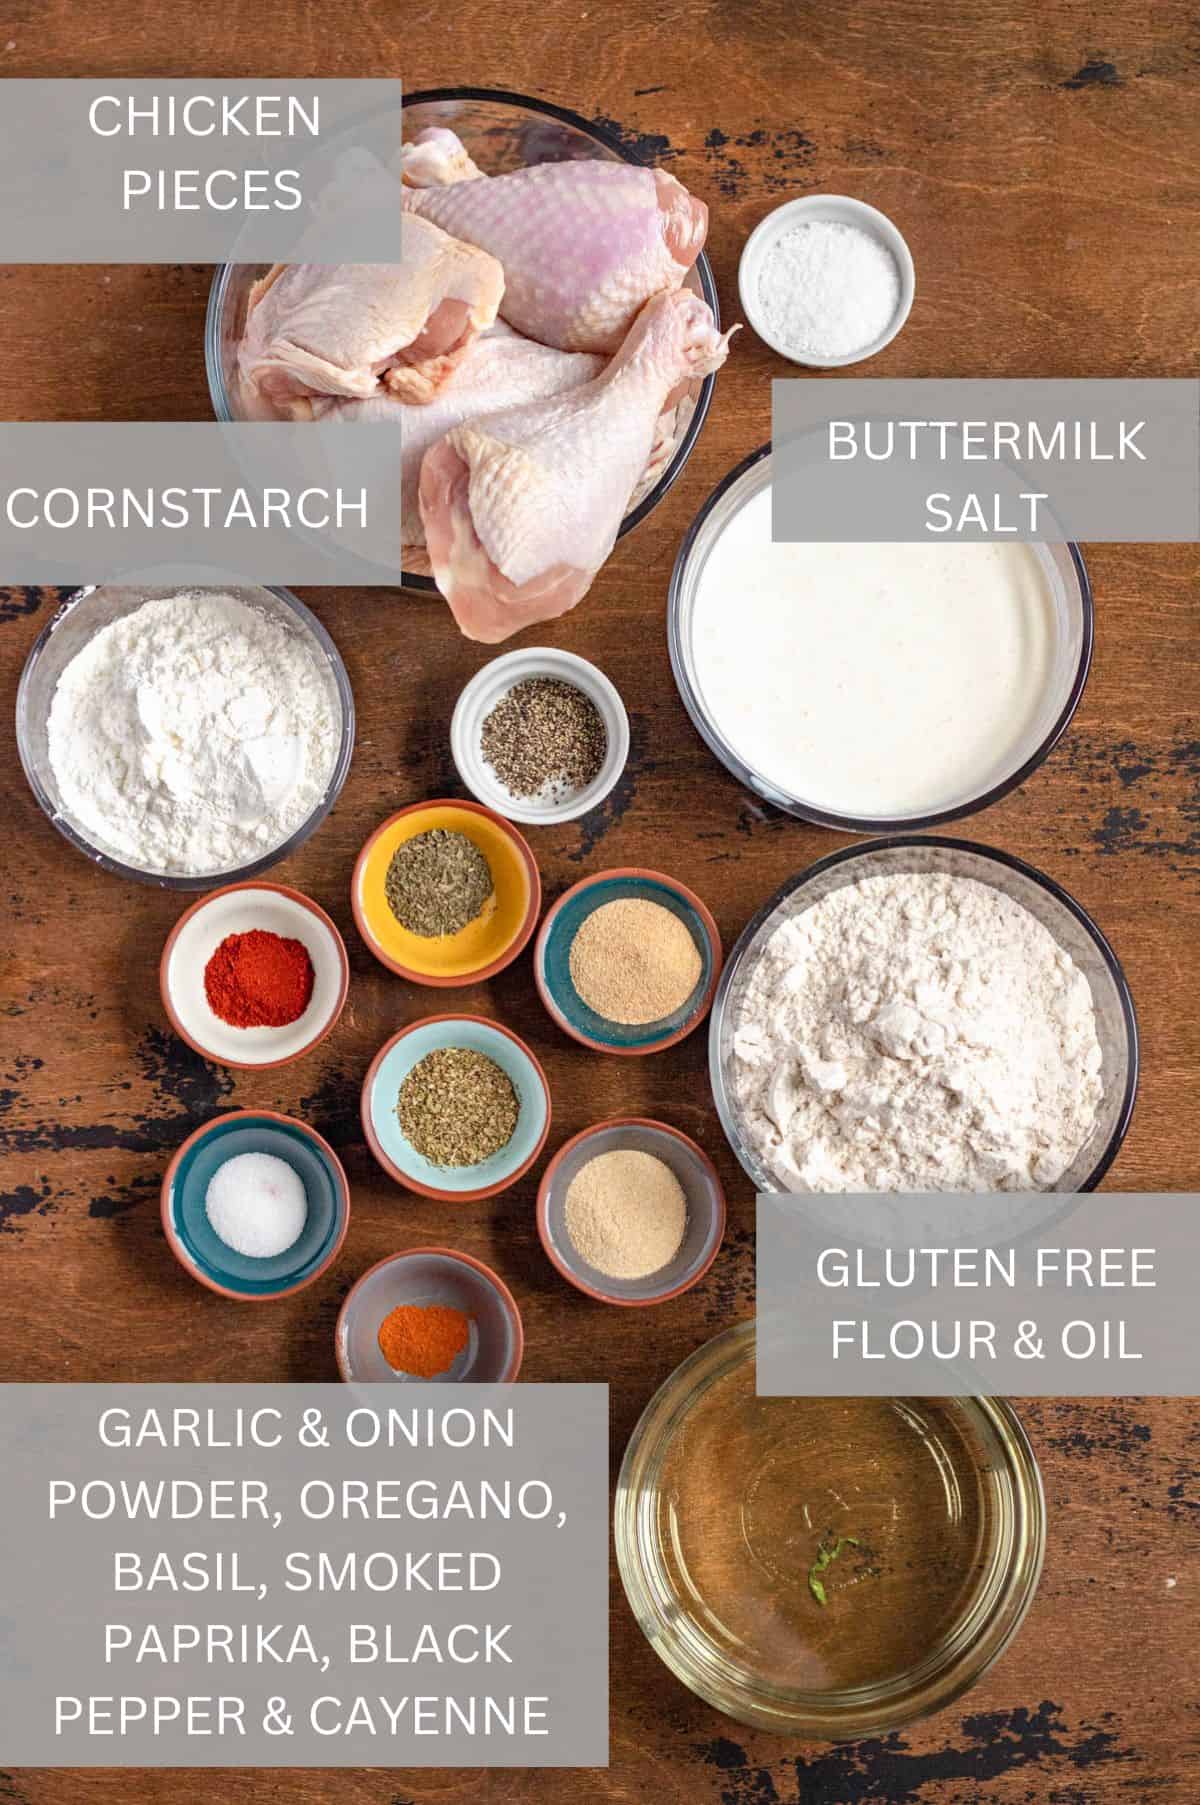
- 4 cups buttermilk
- 2 tablespoon kosher Salt
- ½ teaspoon black Pepper
- 4 lb bone-in, skin-on chicken pieces (legs, breasts, or thighs)
Coating Ingredients
- 1-quart Vegetable Oil, for Frying
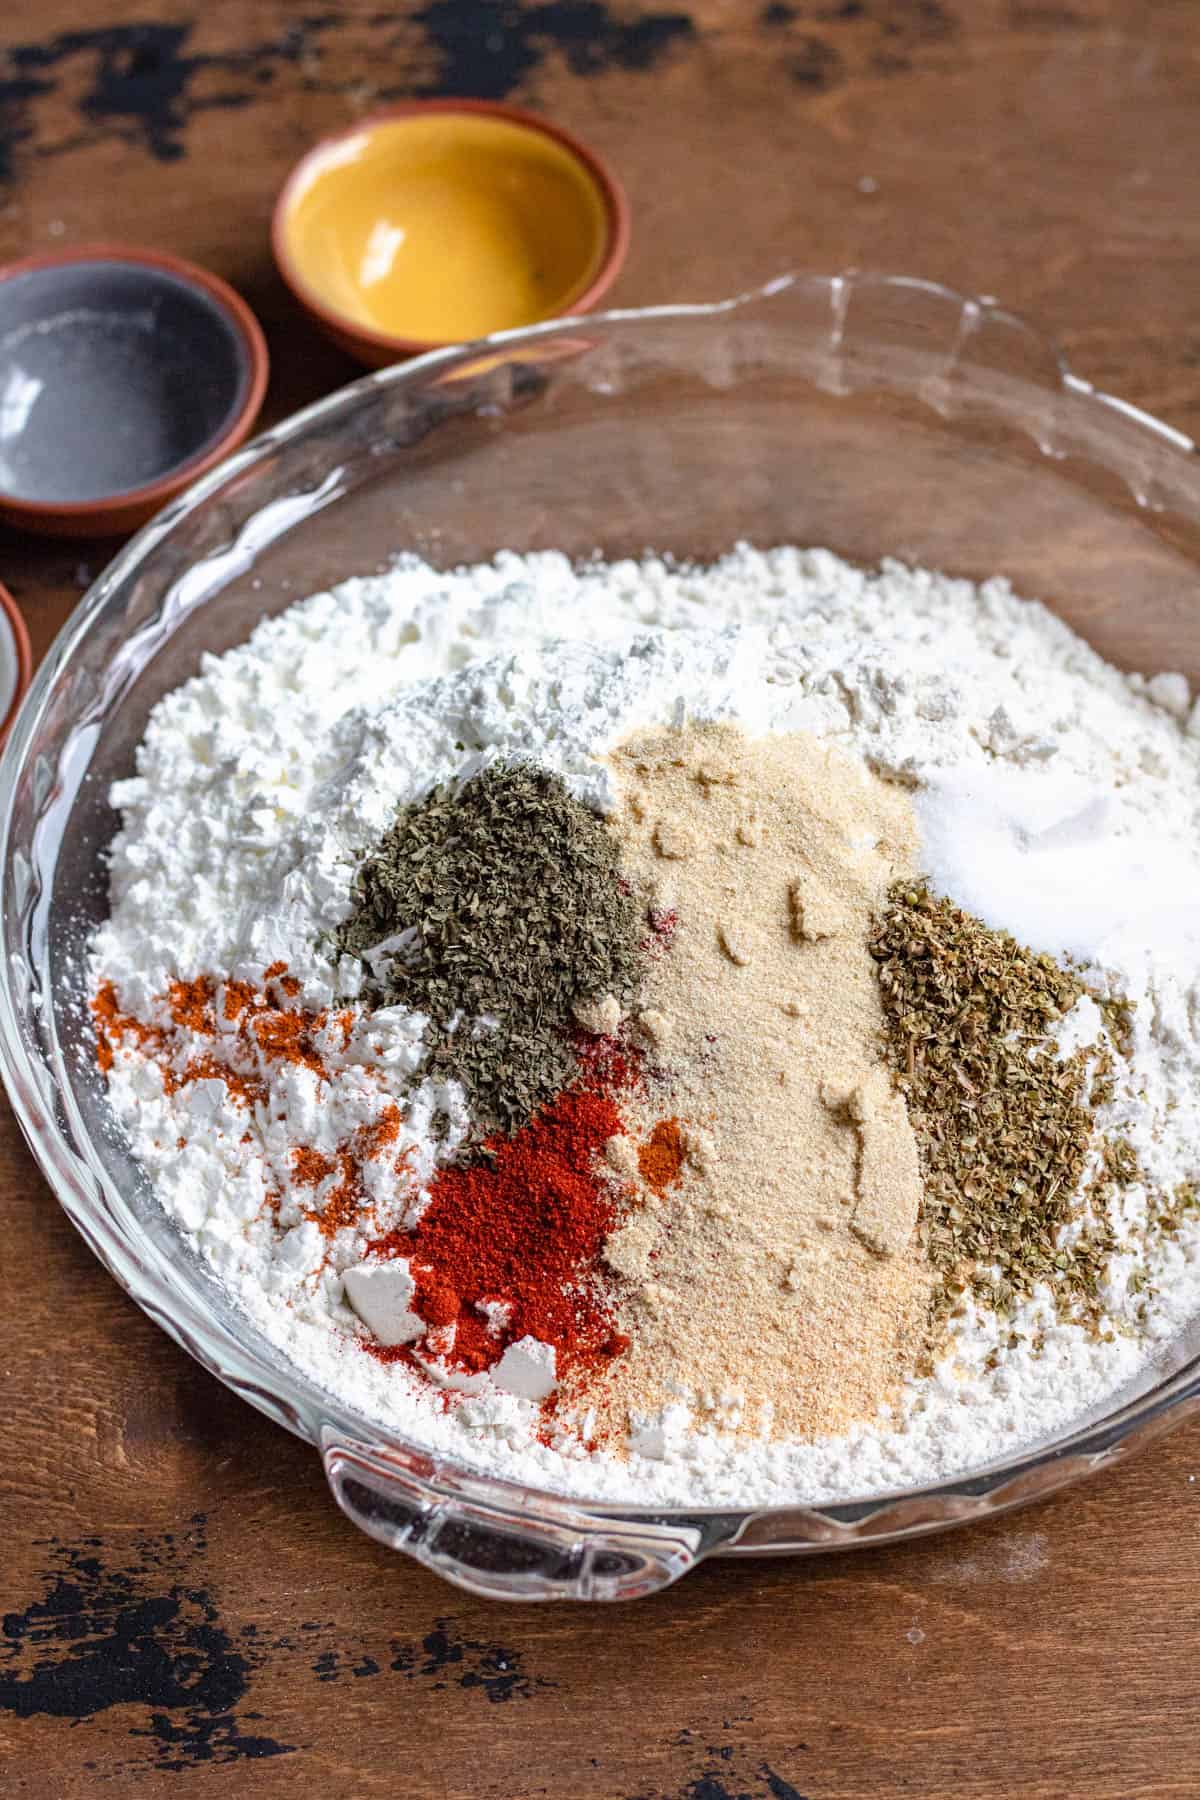
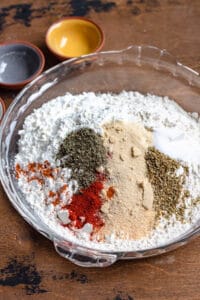
- 2 ½ cups Gluten Free Flour
- ¾ cup Cornstarch
- 1 tablespoon Garlic powder
- 1 tablespoon Onion powder
- ½ tablespoon Oregano
- ½ tablespoon Dried Basil
- 1 teaspoon Smoked Paprika
- 1 teaspoon Salt
- Cayenne Pepper, to taste
How To Make Gluten-Free Fried Chicken
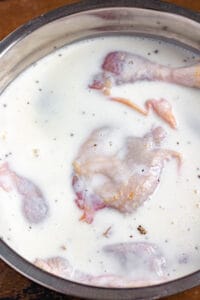
Step 1: In a large bowl, combine the buttermilk, kosher salt, and black pepper and whisk to combine.
Step 2: Add the chicken into the buttermilk bowl, making sure that the chicken is covered evenly by the buttermilk.
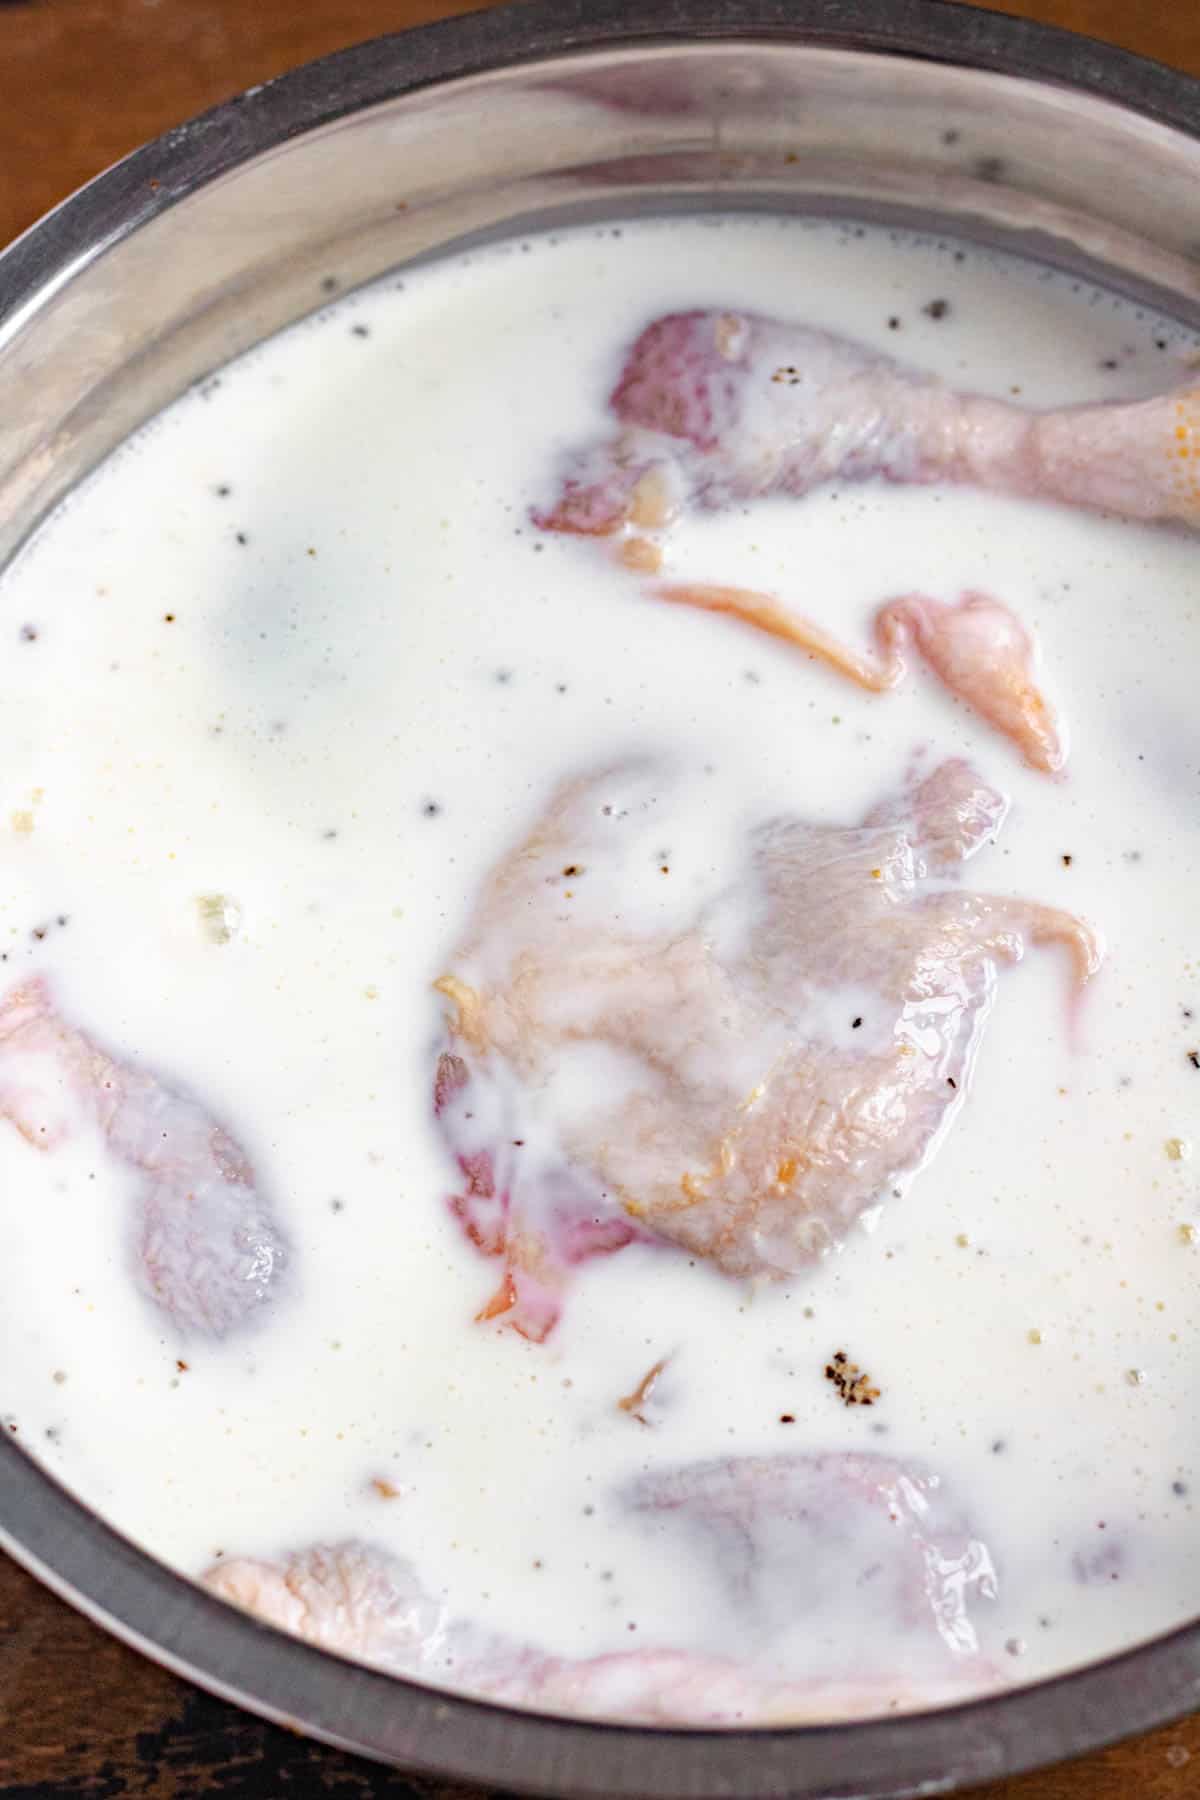
Step 3: Cover the bowl and place it in the fridge for a minimum of two hours or overnight.
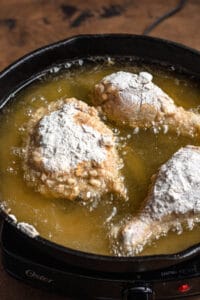
Step 4: When your chicken is done bringing, add a large skillet to the stove. Add about an inch of oil to the bottom of the skillet and turn the heat to medium-high. Heat the oil until it reaches 350 degrees Fahrenheit.
Step 5: While your oil is warming up, prep the coating. Whisk the remaining coating ingredients together in a shallow bowl to do so.
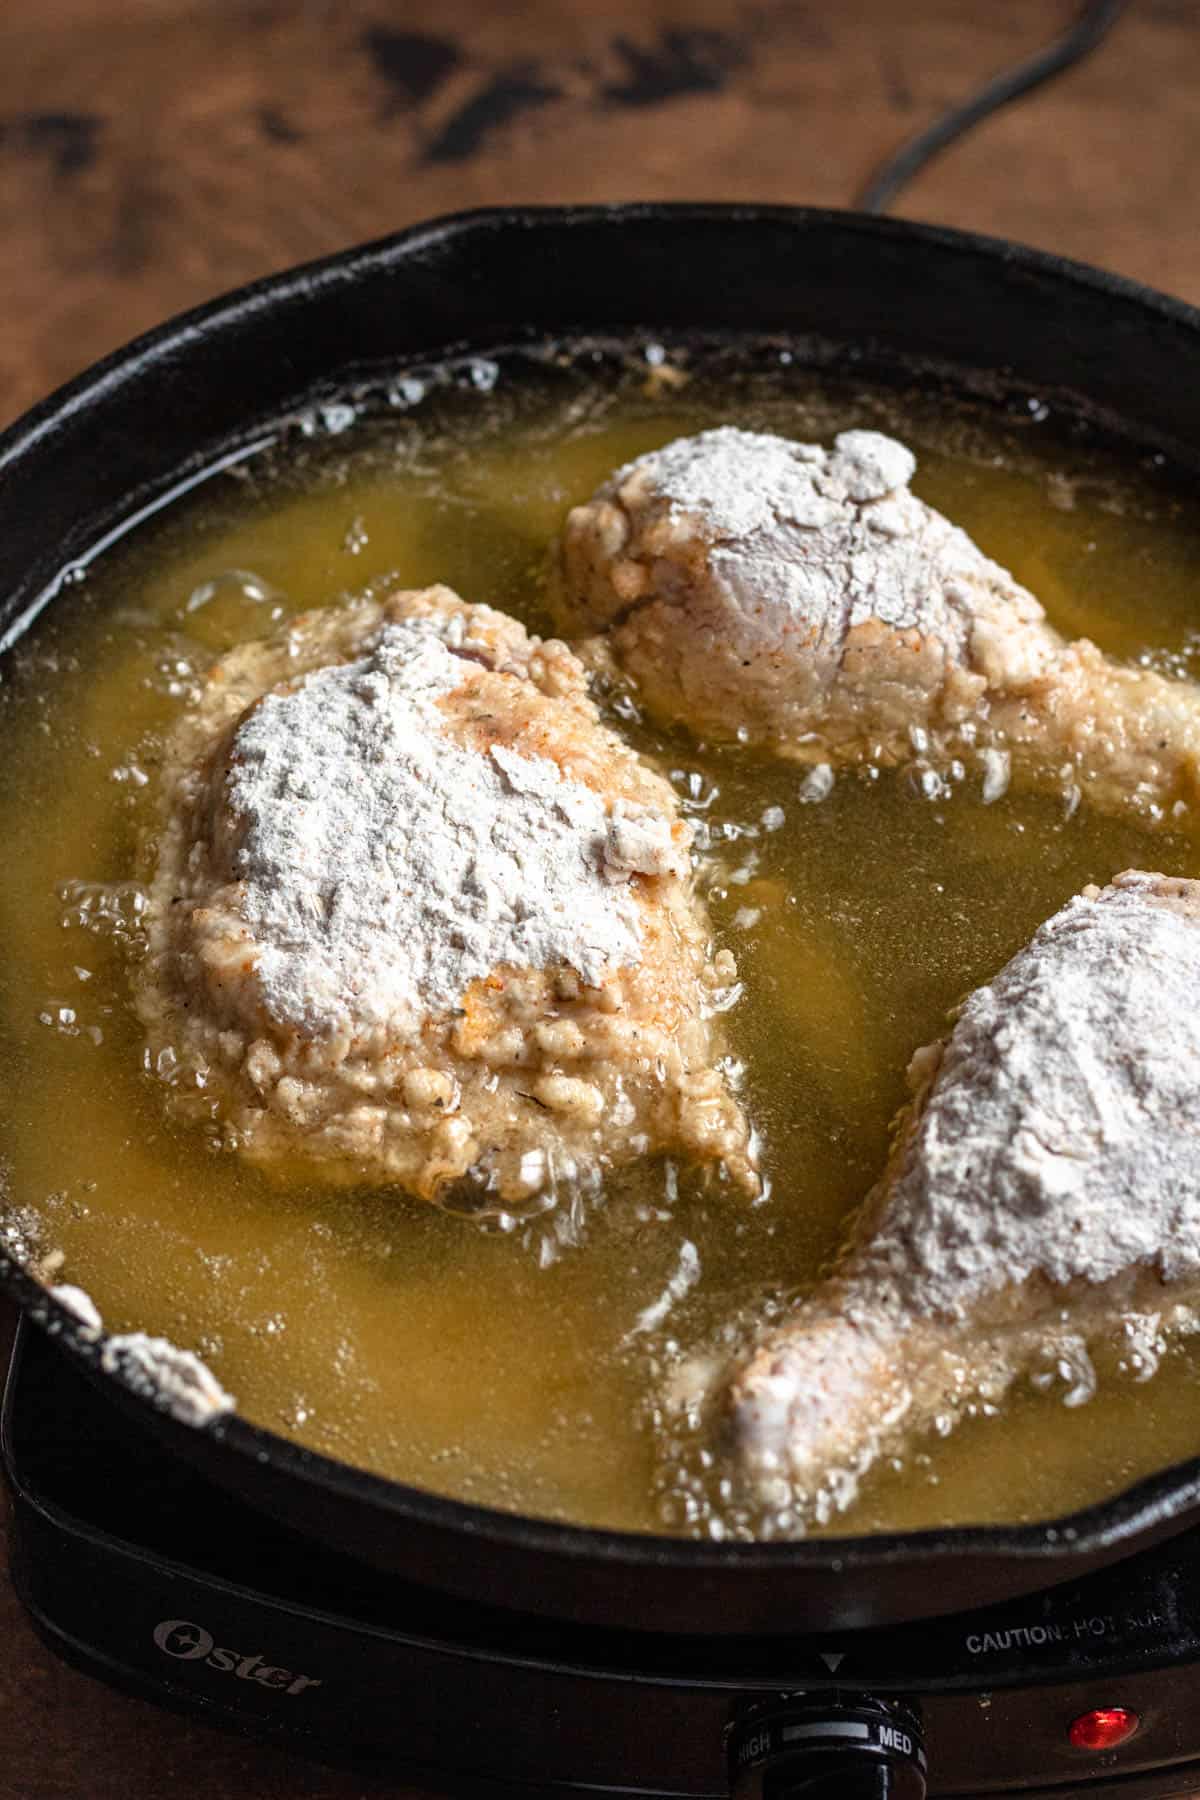
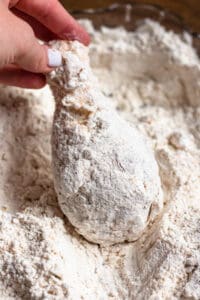
Step 6: When your oil is ready, it’s time to fry. Remove each piece of chicken from the buttermilk and then dip it in the coating mixture, turning the chicken so that it is thoroughly coated on all sides.

Step 7: Add a few pieces of chicken to the hot oil. Allow the chicken to cook for about 15-18 minutes, turning occasionally. Cook until the outside of the chicken is evenly browned and internal temperature reaches 165 degrees Fahrenheit.
Step 8: Continue until all of the chicken is cooked. Serve and enjoy!
Recipe FAQs
Can You Eat Fried Chicken With Celiac Disease?
- Typically, fried chicken contains gluten due to the breading. However, this recipe uses all gluten-free ingredients including a gluten-free flour blend so that if you have celiac disease you can eat it.
What Is The Best Type Of Gluten-Free Flour To Fry Chicken?
- Any gluten-free flour will work for my gluten-free fried chicken recipe. I recommend Bob’s Red Mill Gluten-Free Flour or King Arthur.
How Can I Avoid The Breading Falling Off The Chicken?
- To avoid the breaded coating falling off of your fried chicken make sure you coat the chicken completely in the breading. Once the chicken is completely coated pat it on all sides so that it sticks to the chicken. Be patient when it's frying so that the breading has time to adhere to the chicken. Don’t put the chicken too close together or flip them too much or the breading may also fall off.
What Kind Of Oil Is Best For Frying?
- I like to use vegetable oil for frying because it can withstand high temperatures before it starts to burn, which we need when frying chicken. You can also use avocado oil.
Can You Make This Recipe In An Air Fryer?
- I don’t recommend using an air fryer for this gluten-free fried chicken. If you use an air fryer for your gluten-free fried chicken your breading may not get crisp and your chicken may dry out.
How Can I Tell When My Chicken Is Done?
- Once your chicken breading is crisp and brown on the outside and the internal temperature of the chicken has reached 165 degrees Fahrenheit it’s done! If you don’t have an internal thermometer, cut a small piece of the chicken and check the inside to see if it's done before consuming.
Expert Tips
- Make sure to coat the chicken immediately before frying. If you coat it and then allow it to rest without frying immediately, the coating will change textures.
- You can also coat your chicken by putting the coating in a large bag and adding the chicken. Seal the bag and then shake until the chicken is evenly coated.
- Add hot sauce to the brine if you want a spicier chicken!
- Drain on a drying rack to keep the breading crispy.
Storage & Reheating Instructions
Store your gluten-free fried chicken in an airtight container or Ziploc bag in the refrigerator for 3 - 4 days. Make sure to store your chicken within 2 hours of cooking so that you don’t run the risk of consuming bad chicken. If you don’t think you’ll eat your leftover chicken within 3 - 4 days I suggest freezing it.
If you do freeze it, thaw it by taking it out of the freezer and placing it in a bowl to thaw overnight.
Once your leftover fried chicken is thawed and at room temperature, you can reheat it by preheating your oven to 400 degrees Fahrenheit and placing a flat wire baking rack on a baking sheet. Once your oven is preheated, place your chicken on the rack-lined baking sheet in the oven and bake for about 15 minutes or until the skin is hot and crispy.
Need an EASY and delicious breakfast, lunch, dinner or dessert?
Take a look at my Sheet Pan Meals and More!
NEED MORE GOODNESS? Follow me on Facebook, Instagram, Pinterest, and Twitter for great recipes, entertaining ideas and more!
Gluten Free Fried Chicken

Ingredients
Brine
- 4 cups buttermilk
- 2 tablespoons kosher salt
- ½ teaspoon black pepper
- 4 pounds bone-in, skin-on chicken pieces (legs, breasts, or thighs)
Coating Ingredients
- 1 quart vegetable oil, for frying
- 2 ½ cups gluten free flour
- ¾ cup cornstarch
- 1 tablespoons garlic powder
- 1 tablespoons onion powder
- ½ tablespoons oregano
- ½ tablespoons dried basil
- 1 teaspoon smoked paprika
- 1 teaspoon salt
- cayenne pepper, to taste
Instructions
- In a large bowl, combine the buttermilk, kosher salt, and black pepper and whisk to combine.
- Add the chicken into the buttermilk bowl, making sure that the chicken is covered evenly by the buttermilk.

- Cover the bowl and place it in the fridge for a minimum of two hours or overnight.
- When your chicken is done brining, add a large skillet to the stove. Add about an inch of oil into the bottom of the skillet and turn the heat to medium-high. Heat the oil until it reaches 350 degrees Fahrenheit.
- While your oil is warming up, prep the coating. To do so, whisk the remaining coating ingredients together in a shallow bowl.
- When your oil is ready, it’s time to fry. Remove each piece of chicken from the buttermilk and then dip it in the coating mixture, turning the chicken so that it is thoroughly coated on all sides.
- Add a few pieces of chicken into the hot oil. Allow the chicken to cook for about 15-18 minutes, turning occasionally. Cook until the outside of the chicken is evenly browned and internal temperature reaches 165 degrees Fahrenheit.
- Continue until all of the chicken is cooked. Serve and enjoy!
Notes
- Make sure to coat the chicken immediately before frying. If you coat it and then allow it to rest without frying immediately, the coating will change textures.
- You can also coat your chicken by putting the coating in a large bag and adding the chicken. Seal the bag and then shake until the chicken is evenly coated.
- Add hot sauce to the brine if you want a spicier chicken!
- Drain on a drying rack to keep the breading crispy.

Leave a Reply