


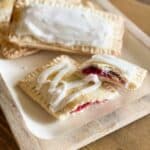
These homemade gluten-free pop tarts are a flaky, fruity treat made with a buttery homemade crust and filled with sweet raspberry jam. Perfect for a quick breakfast or snack, these pop tarts are easy to make in 45 minutes and are freezer friendly for those hectic mornings.

I grew up enjoying the classic brown sugar cinnamon pop tarts. Since being diagnosed with celiac disease over a decade ago, it has been challenging to find a really good gluten free version. My mom and I made it our mission to create a homemade version that actually tastes much BETTER and more like a gourmet bakery version of this classic breakfast pastry.
These pop tarts check all the boxes with a buttery, flakey crust filled with a jam that's just sweet enough. Plus, they aren't filled with artificial dyes or ingredients like the store-bought version. It is a fresh and delicious recipe like our gluten free peach cobbler.
Let me Tell you why these gluten free pop tarts are the best!
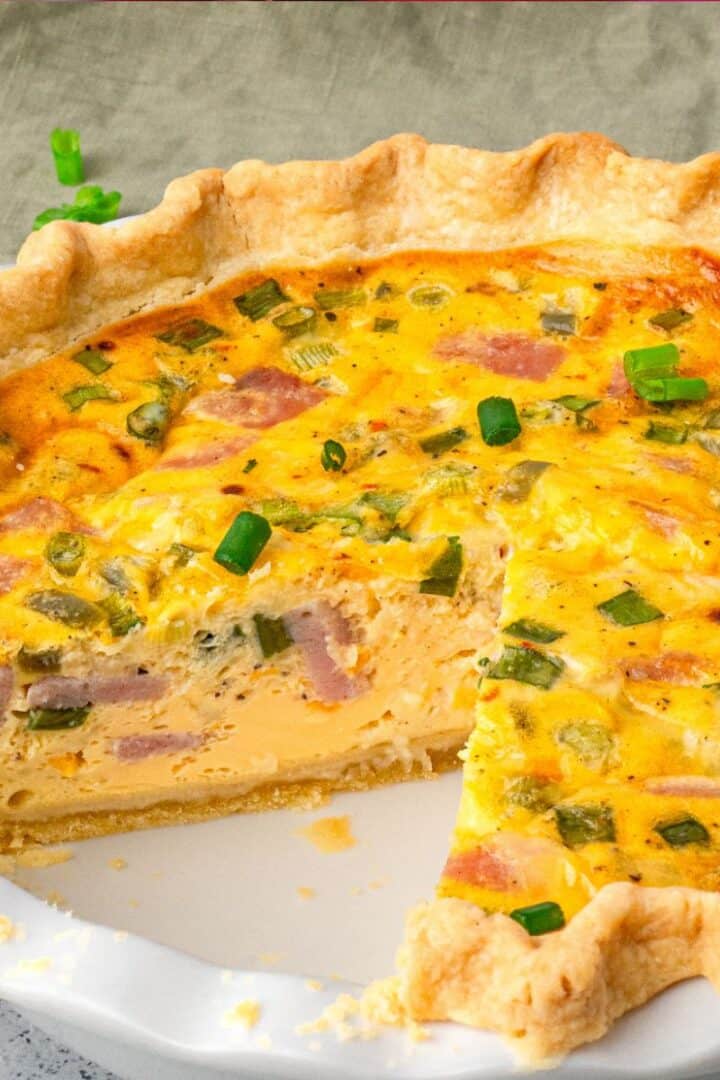
- Perfect texture: With an irresistibly flakey crust, you won't even know this recipe is gluten free, similar to my famous gluten free cinnamon rolls or gluten free quiche. We tested and detested this flaky pastry crust until it was perfect using the perfect amount of butter to dry ingredients.
- Customizable: While we fill with a raspberry or strawberry filling, I've also tried brown sugar filling and blueberry pie filling for the perfect bite. You can also top them with our peanut butter frosting or a glaze and sprinkles.
- Freezer friendly: If you want a quick breakfast for the family, make a big batch of these pastries and stash some in the freezer for those busy mornings. All you have to do it pop them in the toaster because they aware already baked!
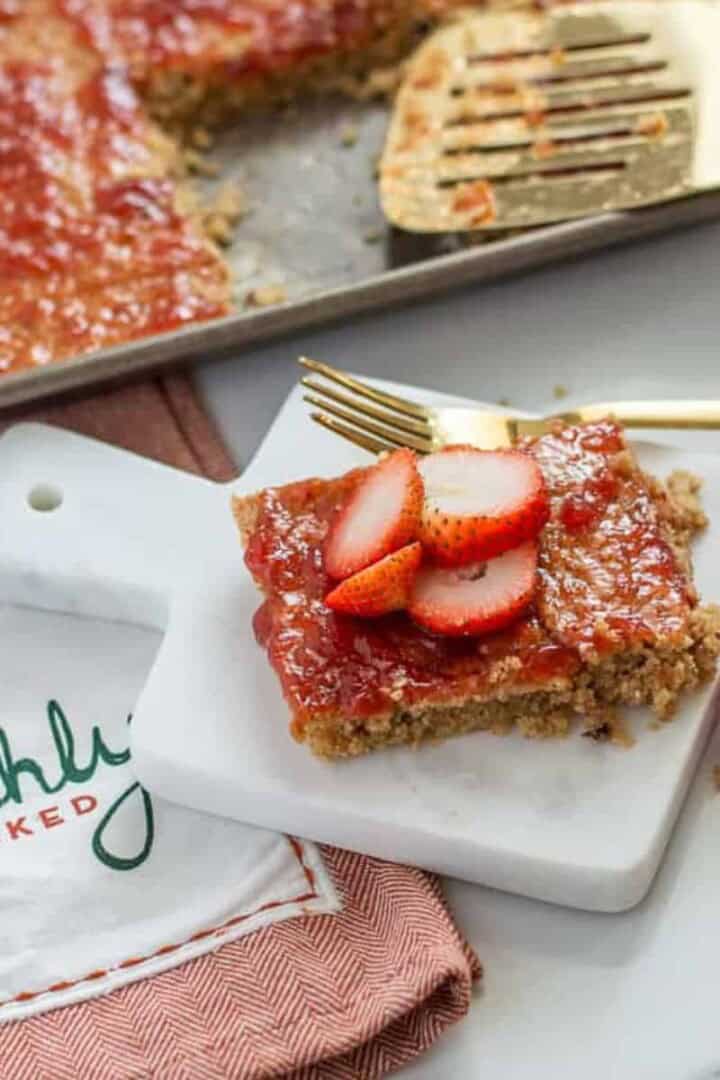
- No artificial ingredients: These pop tarts are made with simple ingredients that come together perfectly. I like to use fresh berries for filling and suggest trying a peaches options in late summer as well. And I also recommend our strawberry baked oats for another great breakfast.
Ok but what do you need to make them...
- Gluten-free flour - My favorite gluten-free flour uses a blend of brown rice flour, white rice flour, tapioca starch, as well as a few other ingredients. I know mixing flours requires more work but these can still be made in under 35 minutes and they are just so flaky and delicious. If you need to, you can swap out the first four flours and Xanthan gum for King Arthur all purpose gluten free flour but I still recommend blending.
- Butter - For the flakiest crust, frozen butter is essential. We have tried it at room temperature butter but when frozen and folded into the dough, it creates thin sheets of butter that melt as the pastry bakes and releases steam. That steam puffs up the dough more and makes the BEST flaky layers. Plus it gives it bursts of buttery flavor and keeps the dough from getting too greasy.
- Buttermilk & Apple Cider Vinegar- Buttermilk and buttermilk powder add lift to these pop-tarts. Unlike regular milk, buttermilk along with some apple cider vinegar, which both have acidity, keep the dough tender and light.
- Egg - Egg wash on the dough before baking creates the perfect golden-brown finish which can often be hard to achieve with gluten free dough.
Ok let's get to baking!
Pro Tip: Although chilling the dough is not required, it will prevent it from sticking to the counter. If you have time, I recommend chilling your dough for 10 minutes.
Tips for best results
- Cold ingredients - Using cold butter, water, buttermilk, etc. It is the best way to get that perfectly flaky crust and dough that stays together well.
- Parchment paper - If you're having trouble with the dough sticking, try placing parchment paper in between the rolling pin and your dough. This way, you can roll the dough mess-free!
- Use a pizza cutter - Using a pizza cutter or pastry cutter makes it much easier to get perfect squares.

More gluten free breakfast ideas
- Family favorite breakfast casserole
- The real deal gluten free fried donuts
- Indulgent peanut butter oatmeal bars
- Fluffy pancakes with buttermilk syrup
- Gluten free french toast casserole
Need an EASY and delicious breakfast, lunch, dinner or dessert?
Take a look at my Sheet Pan Meals and More!
NEED MORE GOODNESS? Follow me on Facebook, Instagram, Pinterest, and Twitter for great recipes, entertaining ideas and more!
45-Minute Homemade Gluten Free Pop Tarts
Ingredients
Filling
- 10 ounces frozen raspberries
- ½ cup sugar
- 3 tablespoon cornstarch
Pastry
- ¼ cup brown rice flour
- ½ cup white rice flour
- ½ cup tapioca starch
- ½ cup arrowroot starch
- ½ teaspoon xanthan gum
- ½ teaspoon gelatin
- ½ teaspoon salt
- ½ tablespoon buttermilk powder
- 1 tablespoon sugar
- ½ cup butter frozen
- 1 tablespoon buttermilk
- 1 egg beaten (set aside 2 T)
- ½ tablespoon apple cider vinegar
- 1 ½-2 tablespoon ice water
Icing
- 1 cup powdered sugar
- 1-2 tablespoon milk
Instructions
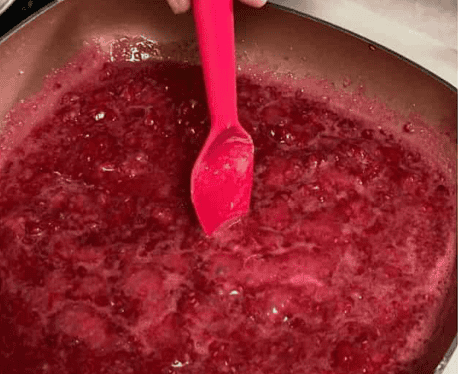
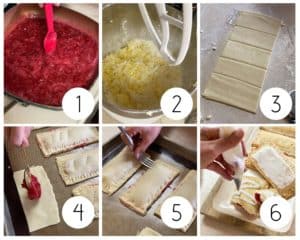
- In a saucepan, combine all filling ingredients and heat on a medium heat, stirring frequently and cook until raspberries are hot and mixture has thickened, remove from heat and set aside
- Preheat oven to 400 degrees then using a stand mixer, combine the first nine dry pastry ingredients; mix well
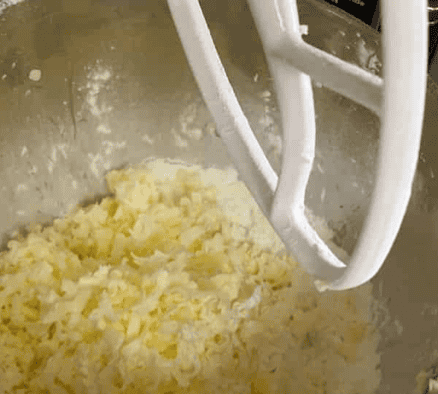
- Remove butter from freezer and grate ½ cube at a time into dry ingredients, lightly fluff in butter as you go
- After all the butter is grated in, mix a few turns until all butter is coated in flour mixture then add buttermilk, vinegar and 2 T of beaten egg with a stir or two in between each one
- Add ice water one tablespoon at a time and mix together until dough sticks together and is a nice smooth texture
- Roll out dough immediately or place in a refrigerator (I recommend 10 minutes), dough should be slightly colder than room temperature when you roll it out, but not refrigerator cold
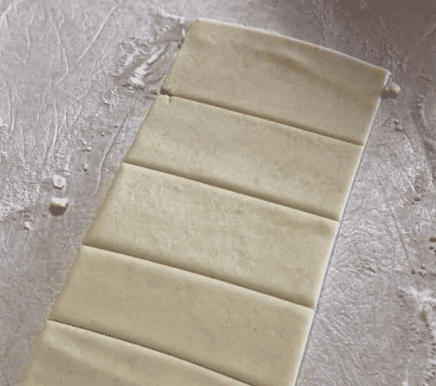
- Place plastic wrap on the counter surface, divide dough in half and roll out one half of dough into a large rectangular shape and use a pizza wheel, cut dough into 3 x 5 rectangles
- After cutting dough, lift plastic wrap edges and invert dough into your hand and place on a baking pad or parchment lined cookie sheet, leave enough space in between each pastry that you can work around it
- Get a small bowl of water to dip your fingers in
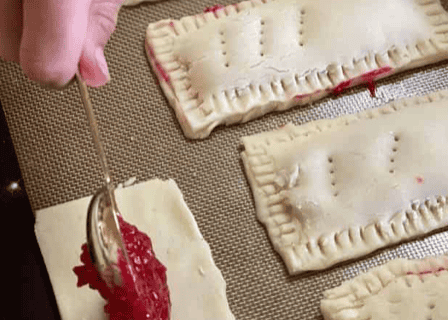
- Place 3-4 T of raspberry filling on each pastry, spread to the shape of the pastry leaving ¼ inch around all edges

- Dip your finger in the water and run it around the edge of the pastries then roll the other half of dough as directed and place on top of the filled pastries
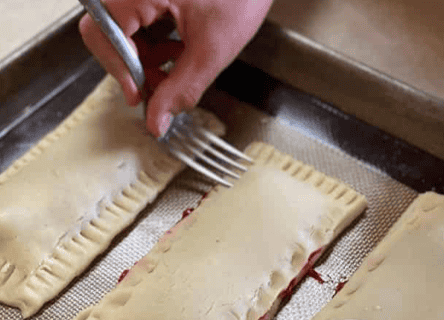
- Using the tines of a fork, seal the edges of each pastry and make a few decorative holes in the top for venting
- Lightly brush the tops (not edges) with remaining egg and bake for 17-19 minutes or until golden brown
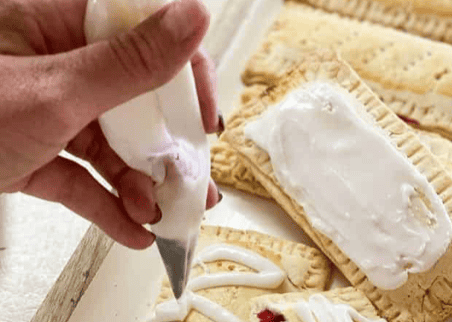
- For icing, combine powdered sugar and milk, mix until smooth. Place in a ziploc bag, snip a small piece from the corner and squeeze on in a pattern of your choice. Ice pastries when ready to eat (do not ice before toasting)
Notes
Storing and make ahead
Storing: These gluten free pop tarts will keep for up to 4 days at room temperature in an airtight container or ziplock baggie. Reheat in the toaster or microwave before enjoying. Freezing: Let pop tarts cool completely and store in a freezer-safe bag. When ready to eat, throw them in the toaster for a quick breakfast. They'll last in the freezer for up to 3 months.Tips for best results
- Cold ingredients - Using cold butter, water, buttermilk, etc. is the best way to get that perfectly flaky crust.
- Parchment paper - If you're having trouble with the dough sticking, try placing parchment paper in between the rolling pin and your dough. This way, you can roll the dough mess-free!
- Use a pizza cutter - Using a pizza cutter or pastry cutter makes it much easier to get perfect squares.
Nutrition
This post was originally posted on July 3, 2017. It has since been updated with new photos and step by step picture instructions. The recipe is still the same delicious one. Here is the original photo...


Penny says
Replacement for cornstarch? I’m allergic
Chandice says
You can replace it with white rice flour but corn starch really works the best.
Ramona says
As soon as I saw these I pinned it within a second, I have been meaning to make these for quite some time and I have found the perfect recipe! Thank you for sharing this, I cant wait to make them again!
Tammy says
I loved Pop Tarts growing up. These look so delightful and flaky...delicious little treats to make!
Aya says
Since my diagnosis, I have not had pop tarts, so I was so excited to find your recipe. The pop tarts turned out amazing, even better than the store-bought ones. Thank you for bringing back great childhood memories!
Chandice says
Awww thanks Aya, I am so glad you loved them!
Katie Crenshaw says
These were so fun to make and turn out delicious! Much better than the store bought boxed version! I made a batch and froze half to eat later!
Chandice says
What a great idea! Thanks, I am so glad you love them. 🙂
Dennis Littley says
I'm going to make these again for my GF niece the next time shes over!
Thanks for the recipe
Mikayla says
We chose to use a seedless strawberry jam we made and left off the icing, but have to say they were very good. I would not have guessed they were gluten free. Thanks for the recipe.
Chandice says
Great idea! Thanks, I am so glad you weren't able to tell they were gluten-free.
Healing Tomato says
I am so glad you made a gluten-free version of pop-tarts! I made this for a friend and he just loved it!! His gluten-allergies meant he couldn't eat regular pop-tarts! Will make them again and again.
Chandice says
So happy to hear that, it's always nice to have something you haven't in a long time. So glad we could help!
Colleen says
I loved pop tarts as a child, and I'm thrilled that I can have them again thanks to this recipe. They turned out perfectly and are a delicious treat.
Kayla DiMaggio says
Gluten-Free Pop Tarts?? Ummm sign me up! These were so delicious and reminded me of the pop tarts of my childhood! So glad I can enjoy them again!
Marta says
These gluten free pop tarts were so perfect for breakfast this morning. Raspberry is my favorite fruit, so these were calling my name. The recipe was easy to follow. Will definitely be making these more often.
Alesha says
These look so good! Have you tried a measure for measure blend to make these? If so, which would you recommend?
Chandice says
I haven't but I would try Cup4Cup, it's my favorite! Or you can make a big batch of our gluten-free flour here on the blog and use that for much cheaper.;)
Joy says
I saw these on your Instagram and HAD to try them! The pastry was light and flaky and my kids had fun helping with the filling. Such a fun baking project on a cold day!
Sydney Wynne says
I couldn't believe how delicious these pastries were! The best gluten-free pastry i've had for sure!